Pumpkin purée is a staple ingredient in so many delicious baking recipes. Think pumpkin pie, pumpkin bread and pumpkin scones sweetly spiced with autumnal spices like cinnamon, nutmeg and allspice. You can buy canned purée at the supermarket for your baking recipes. But making your own from scratch is a lot easier than you might think.
The key to making pumpkin purée for baking recipes is to ensure that it is not too wet. If it’s too runny or watery, it can mess with the baking recipe and ruin the end result. Not to worry though – read on for some simple tips that will help you achieve perfect pumpkin purée at home.
How to make pumpkin purée less watery
First, pick a variety of pumpkin that is naturally less watery. Smaller pumpkins are usually best. They are sweeter and less fibrous than larger pumpkins used for decorating at Halloween. Most pumpkins sold in halves or quarters at the supermarket will work. So will pumpkins labelled as baking pumpkin, sugar pumpkin or pie pumpkin. Butternut squash, also called butternut pumpkin in Australia, is a good option too.
Second, it’s best to bake the pumpkin in the oven, rather than boiling or steaming it. Baking the pumpkin helps to reduce the moisture content of the pumpkin during the cooking process. I have found that cutting the pumpkin into wedges, placing the wedges flat on a baking tray and baking them uncovered works well.
How much pumpkin do I need for 1 cup of purée?
You need to bake approximately 1.1 pounds / 500 grams of fresh pumpkin to get 1 cup / 225 grams of pumpkin purée. For 2 cups / 450 grams of purée, you would need approximately 2.2 pounds / 1 kg of fresh pumpkin.
However, I recommend baking slightly more pumpkin than you need. This is because the yield can vary depending on the water content of your pumpkin and cooking time in the oven. It’s always better to have slightly more than you need for a recipe than ending up short. I talk about how you can freeze any leftovers below.
Is canned pumpkin the same as pumpkin purée?
You can buy canned pumpkin purée at many supermarkets if you don’t want to make your own. Just make sure you read the label carefully, since it’s important not to confuse it with pumpkin pie filling. Canned pumpkin purée should only list pumpkin as the sole ingredient. On the other hand, pumpkin pie filling will contain sugar and spices in addition to pumpkin.
Personally, I like to make my own purée to use in baking recipes because it’s fresher than canned purée. Making your own also works out cheaper than buying it in cans.
How long does it last?
Pumpkin purée should last for five to seven days in the fridge. Just place it in an airtight container and label it with the date that it was made. Alternatively, you can freeze pumpkin purée in freezer-safe containers or bags for up to 6 months.
How to freeze purée
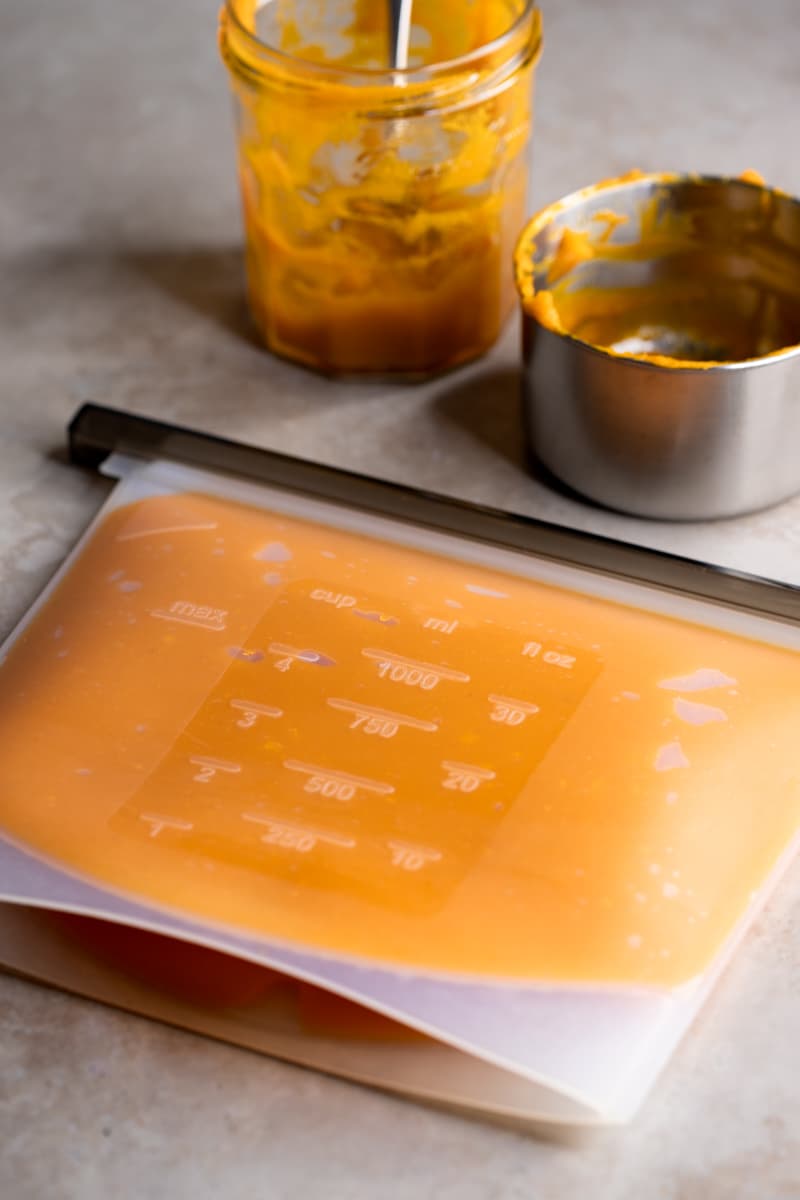
I freeze my pumpkin purée in silicone food pouches. They are so handy for freezing things since they are flexible, airtight and reusable. Zip lock bags work the same way. After sealing a pouch of purée, I place it on its side and spread the purée out into an even layer in the pouch. This allows the purée to freeze in a flat rectangle shape. Freezing things in thinner layers like this makes defrosting a lot quicker than if you freeze it in one big lump.
When freezing pumpkin purée for use in future baking recipes, it’s a good idea to measure it out into portions. I usually freeze purée in 1 cup / 225 gram portions. That way, I know how many portions to defrost for a particular recipe. When I want to defrost the purée, I simply leave it in the fridge overnight.
Pumpkin purée recipes
Incorporating colourful vegetables like pumpkin into your baking recipes is a great way to add some additional nutrients. Pumpkin purée also adds a subtle sweetness to your baked goods and helps to stop them from drying out. Plus pumpkin blends so well with sweet spices like cinnamon, nutmeg and allspice!
If you need some baking ideas for your pumpkin purée, this Easy Gluten Free Dairy Free Pumpkin Bread is one of my favorites. It’s sweetly spiced, moist and comes with an amazing maple glaze. You can enjoy it on its own as a healthy snack, or serve it with the glaze for a pumpkin spice dessert.
I also love how these Gluten Free Pumpkin Chocolate Chip Cookie Bars fill your kitchen with a delicious pumpkin spice scent. They are really easy to make, without butter or eggs so they are vegan and dairy-free.
Watch how to make pumpkin purée
Pumpkin purée recipe
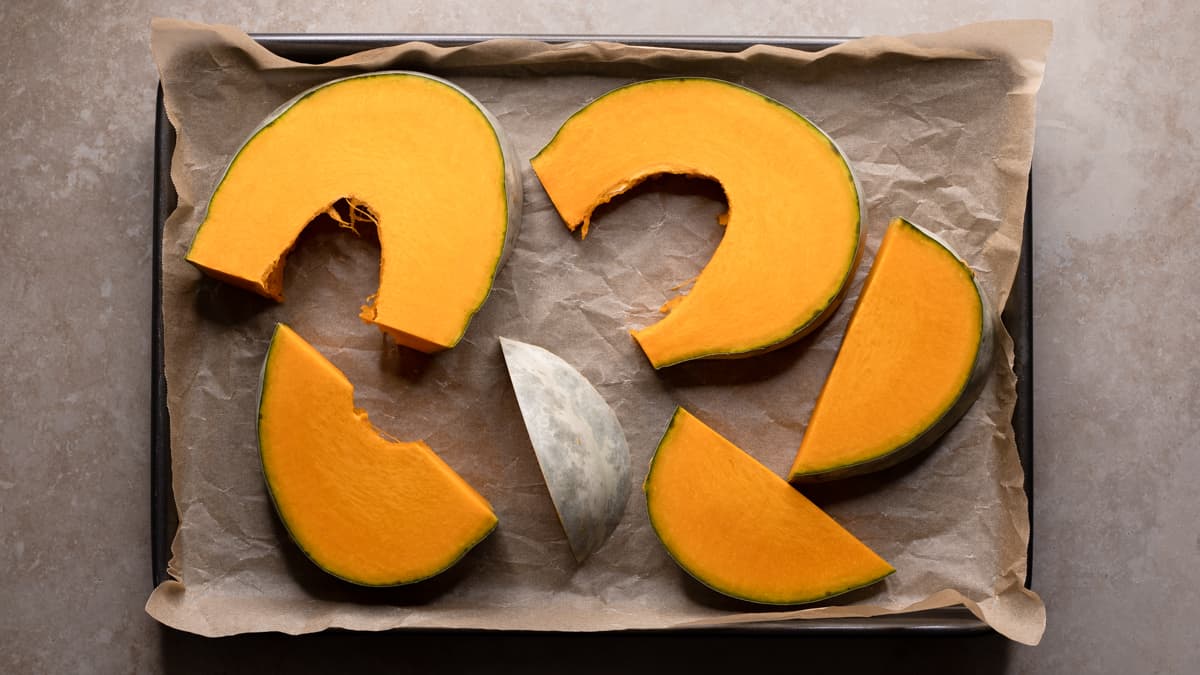
1. Preheat your oven
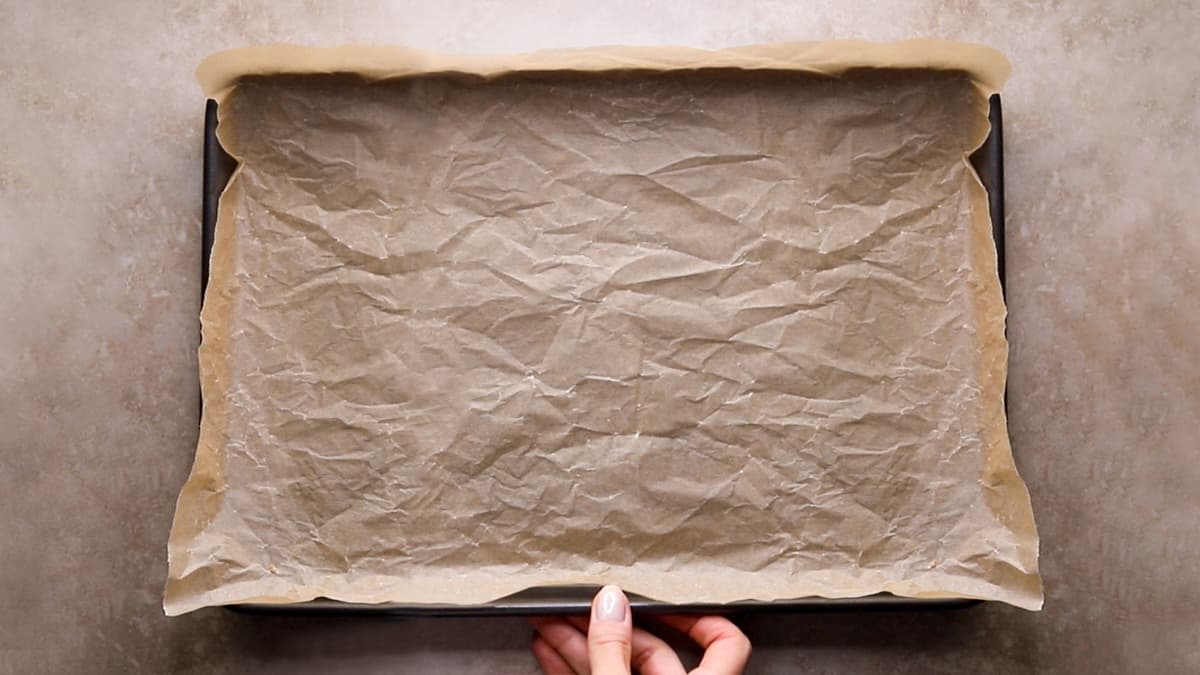
Preheat your oven to 160°C fan-forced / 180°C / 350°F and line a baking tray with baking paper or a silicone baking mat.
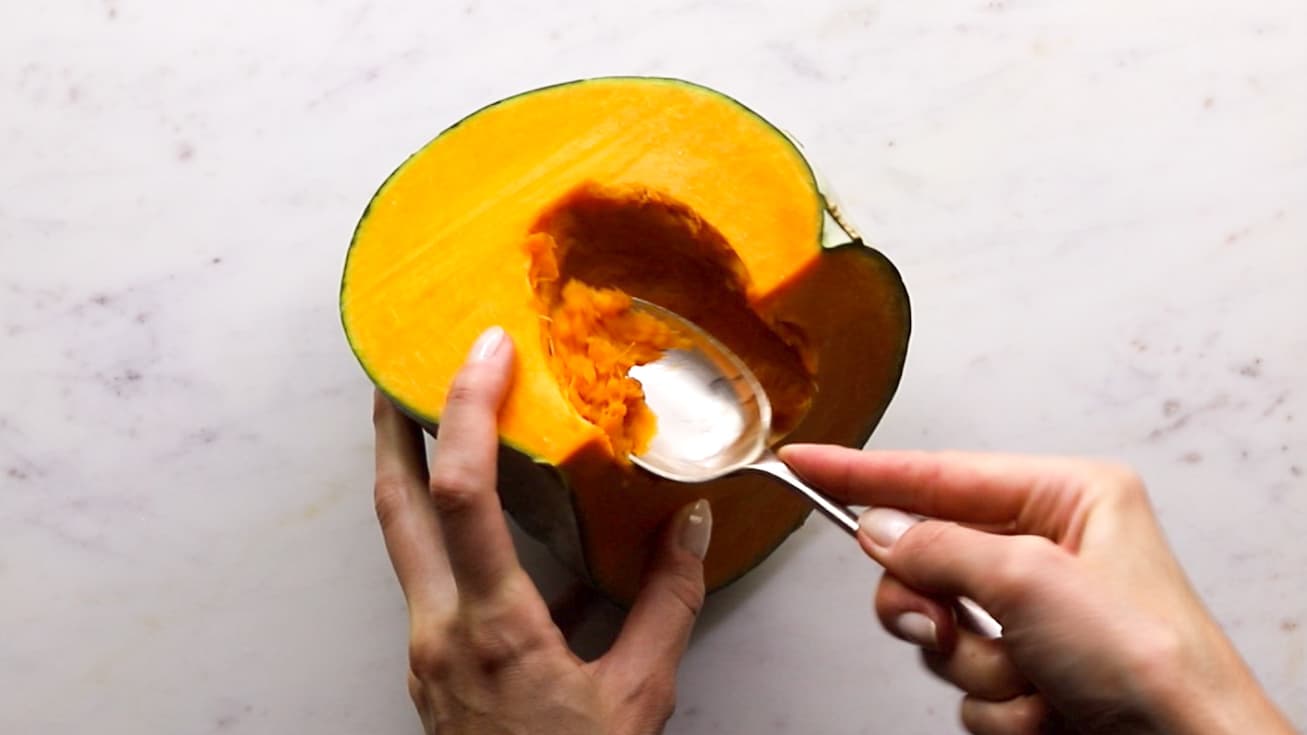
2. Remove the seeds
Start with a quarter or half of a pumpkin. To get 2 cups / 450 grams of purée, the piece of pumpkin will need to be at least 2.2 pounds / 1 kg raw weight. Scoop out the seeds from the middle of the pumpkin with a spoon.

3. Scrape out the pulp
Using your spoon, scrape out any remaining fibrous pulp. You only want the firm portion of the pumpkin to remain.
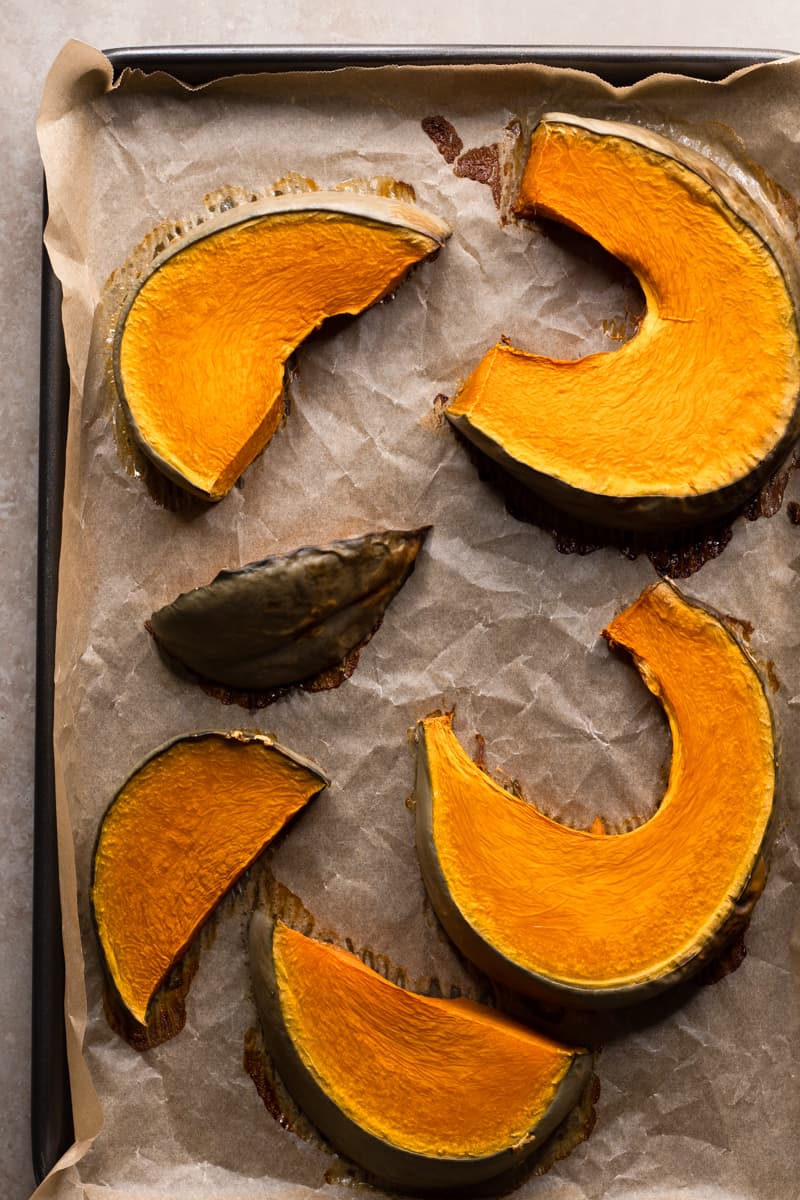
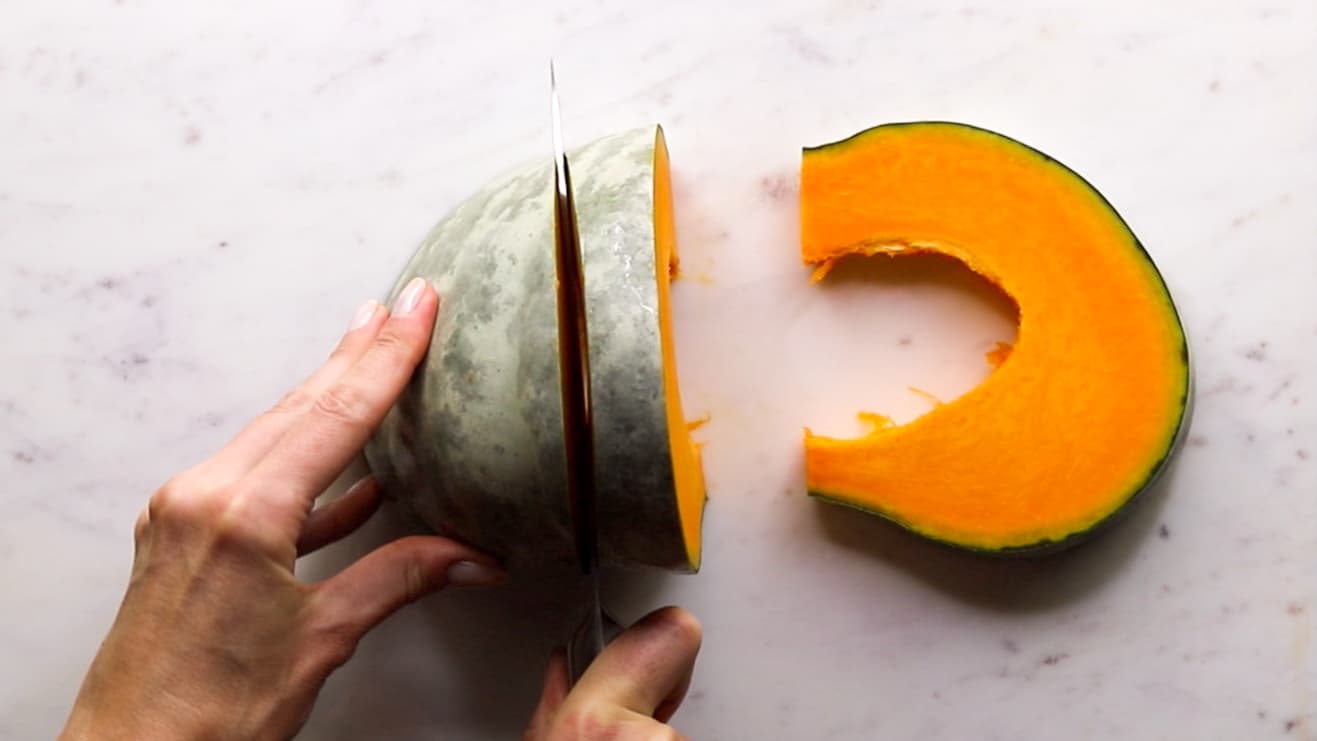
4. Cut the pumpkin into wedges
Turn the pumpkin onto a flat edge so it doesn’t wobble around on your chopping board. Cut the pumpkin into wedges about 1 inch / 2.5 cm thick. Do this slowly and carefully to avoid the knife slipping.
5. Place on baking tray
Place the pumpkin wedges flat onto the lined baking tray. If the wedges don’t fit on one tray, spread them across two trays or bake the pumpkin in batches.
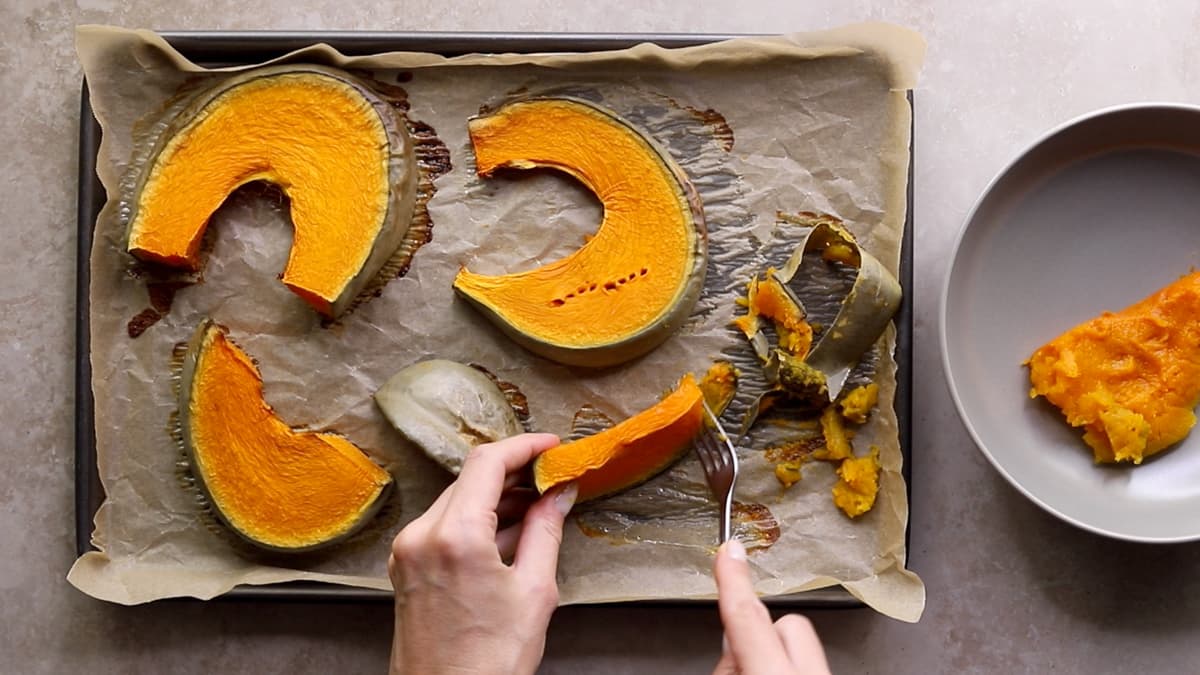
6. Bake in oven
Bake the pumpkin wedges, uncovered, in the preheated oven for 45-60 minutes or until soft. A fork or knife should easily glide through the flesh once soft.
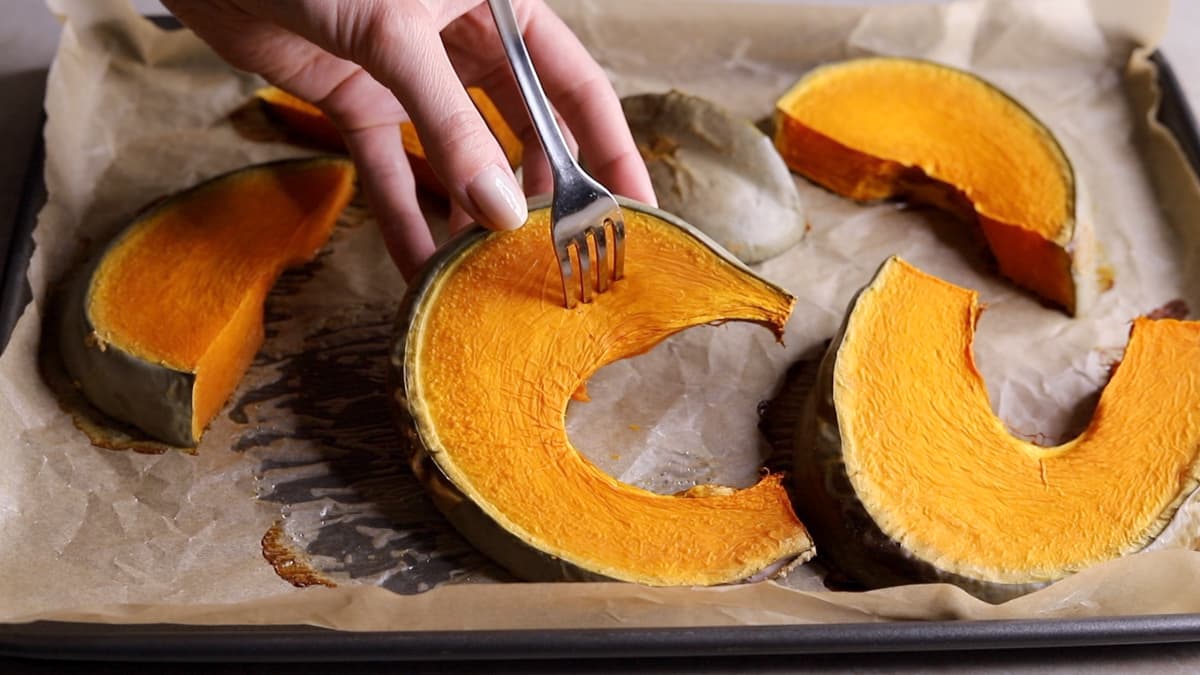
7. Remove the skin
Peel the skin off the pumpkin flesh. I find it easiest to scoop the flesh away from the skin using the edge of a fork or knife.
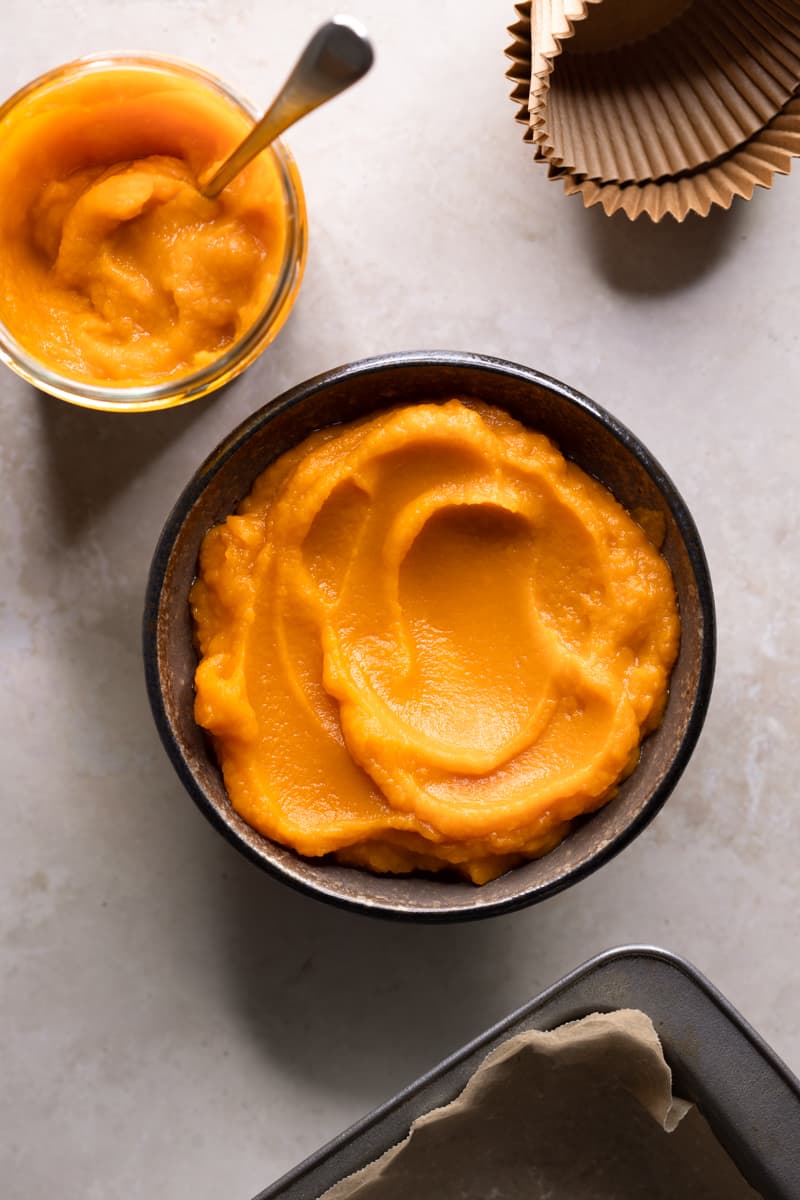
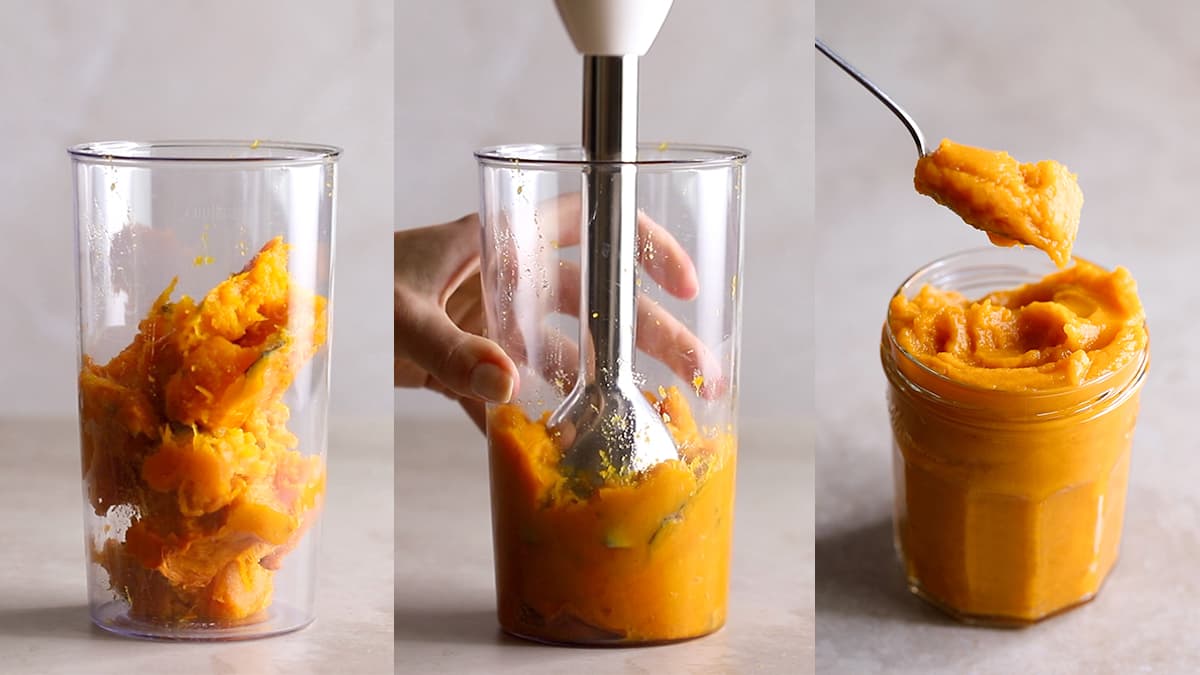
8. Blend until smooth
Place the pumpkin flesh into a food processor or beaker attachment of an immersion blender. Blend the flesh until smooth.
I wish we could buy pureed pumpkin in an Australian supermarket as it would be so convenient.
It would be so convenient! I remember seeing it in the international section of Coles once, but I don’t think it’s widely available anymore.